: Double Chocolate Zucchini Loaf

DSC_1160

The beginning of this moist and sweet morsel began with a journey just down the street.

We’ve been living here a year now and we have stopped at just about every Farmer’s Market… except for the one that is literally 1 minute away. It always looked so tiny and I assumed they must not have much there for variety.

Wrong I was.

morse's

Morse’s Farm Market, Berwick, Nova Scotia

Quaint isn’t it?

This place is full of beautiful fruit and veggies and they have such friendly service…which can be found pretty much everywhere here in the Valley. But I was pleasantly surprised at how much they had in this small store. Besides produce, they had some baked goods and some lovely local honey and jams. They had the best garlic I have ever purchased – you can’t get fresh, juicy and sharp garlic like that at a grocers. They also had beautiful zucchini and pumpkins available. This time, I took home the zucchini. Next time, pumpkins I think.

Lately I had been thinking about making my first ever zucchini loaf. When I seen the offerings at Morse’s Farm Market I was determined to just do it.

My Aunt Lorraine makes wickedly good zucchini loaf. When I was a kid, whenever we visited, she had a loaf made and ready to cut into. Always. I don’t think we visited even once that she was without her signature dessert. It was something I looked forward to on the road trip to my Aunt and Uncle’s.

I remember the first time I found out I was eating zucchini loaf. I was shocked. I thought it was banana bread.

My Aunt’s version is a straight up traditional zucchini loaf. Some recipes add chocolate chips and nuts to them. I didn’t want nuts in mine, and instead opted for more chocolate… why not!

So, after perusing through dozens of recipes, I borrowed a little from here and there. I found Paula Deen’s chocolate chip zucchini bread inspiring. My recipe is heavily influenced by hers.

My kids watched me grating the zucchini and preparing the batter, and asked, doubtfully, “the zucchini…is going….in there?”

Yes, and I promised them it would be delicious.

…They almost looked anxious.

Once they seen the finished gooey chipped, chocolatey loaves, they forgot all about the healthy ingredient hidden inside. They loved it even though they “HATE zucchini!”

This makes 2 scrumptious loaves (if I do say so myself).

DSC_1123

DSC_1137

Ingredients:

2 cups grated zucchini (1 large zucchini )

3 cups flour

1/2 tsp baking powder

1 tsp baking soda

1 tsp salt

1/2 tsp cinnamon

1/2 tsp nutmeg

2 cups white sugar

1/4 cup packed brown sugar

3 eggs, beaten

3/4 vegetable oil

2 tsp vanilla extract

1/2 cup cocoa

1 cup semi-sweet chocolate chips

Method:

Grate zucchini and set aside.

Preheat oven to 350 degrees.

In a medium bowl, sift flour, baking soda, baking powder, salt, and spices and set aside.

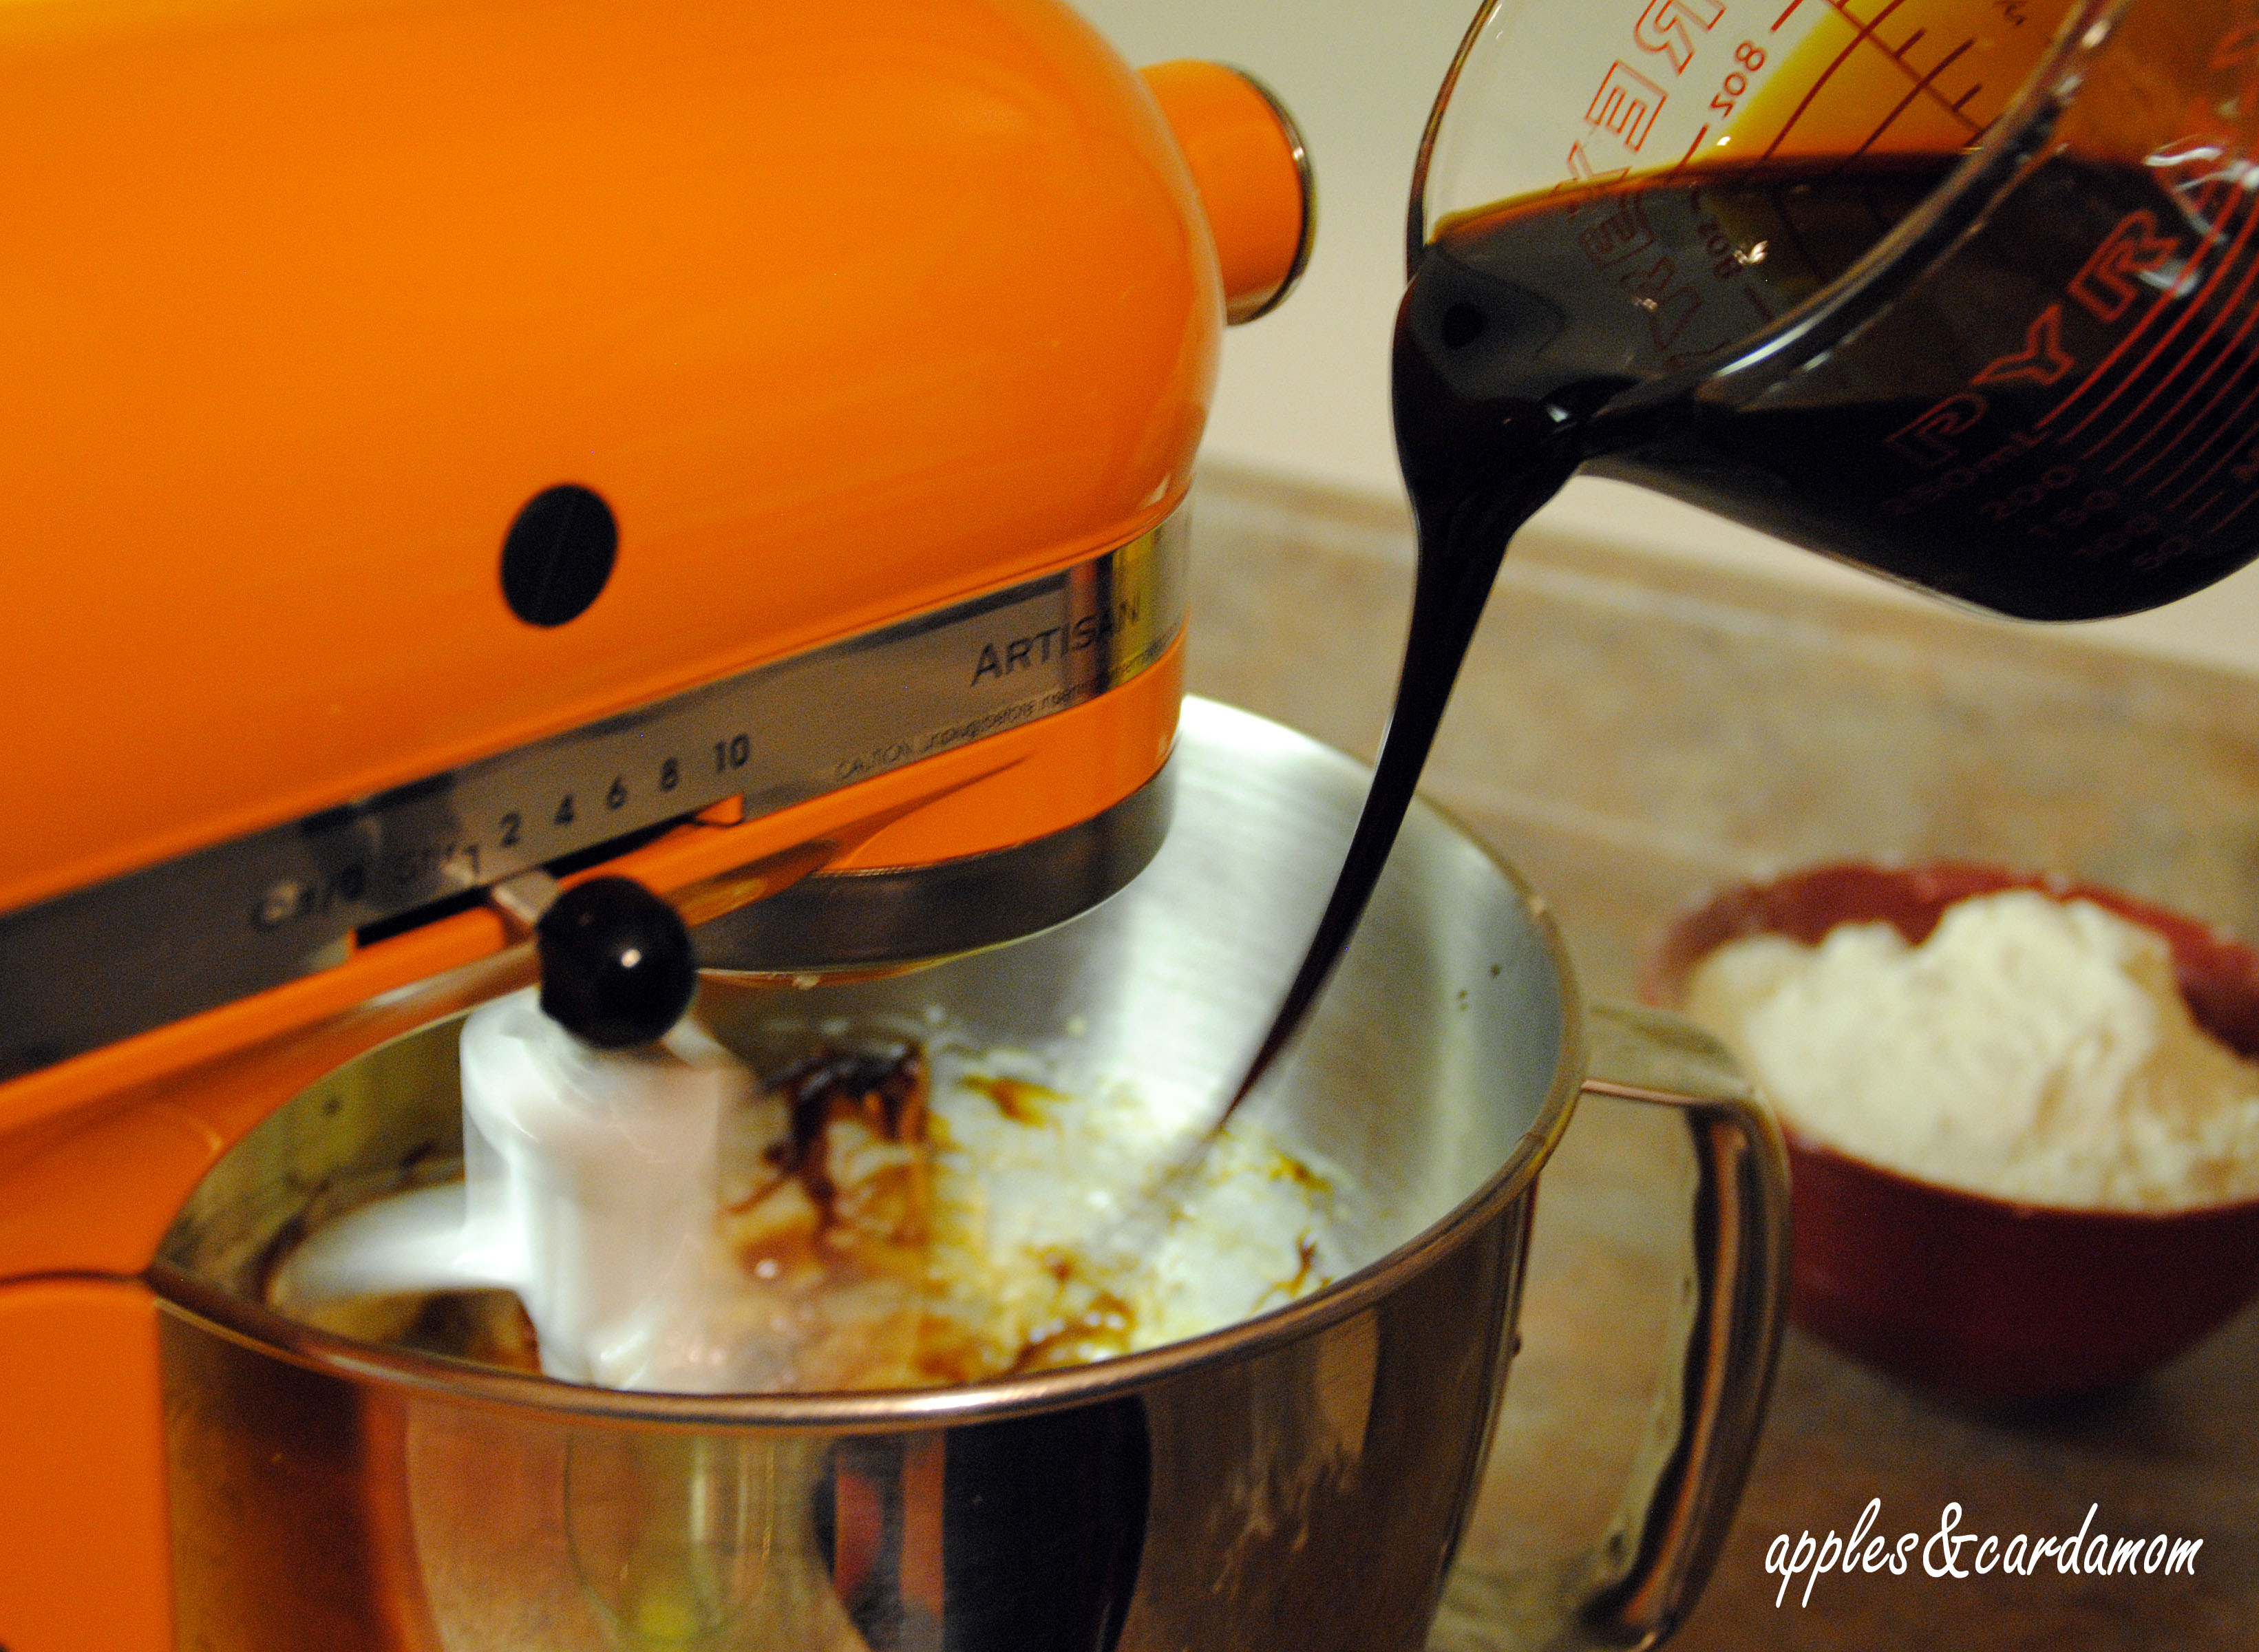
In a large bowl, beat eggs with sugars, vanilla, and oil. Beat in cocoa until well blended.

Slowly pour flour mix into the large bowl, mixing the dry and wet ingredients well (if it looks a bit dry at this point, don’t fret. Don’t add water as the zucchini adds a lot of moisture) . When combined, blend in the zucchini followed by the chocolate chips.

Pour into 2 lightly greased and dusted 9×5″ loaf pans. Bake in center of oven for 50 minutes or until fork comes out clean.

DSC_1156

This is easy to make and tastes great, lots of chocolate flavour with subtle warm spice. Lovely with Chai tea!

: NOT Grandma’s Blueberry Grunt

DSC_0824

Blueberry Grunt has a funny name and a long history here in Nova Scotia.

It’s several generations old and one of the simplest desserts to make. The “grunt” in its title, is believed to come from the sound produced while the sauce bubbles and the dumplings give off an almost..um… rude noise.  They may have called it Blueberry Toot. But Blueberry Grunt it is.

When we were kids, on summer weekends we’d head to the family cottage in Blue Mountain, named for it’s blueberry fields. Here in the Annapolis Valley, we get high bush blueberries. But my favorite will always be the wild field blueberries that grew in back of our cottage.

I have very fond memories of my dad making homemade tin rakes and taking us kids out to the fields to rake the blueberries. We would come back looking like smurfs and it would take days to get the berry stain out from under our nails. We ate them by the handfuls. We ate them on cereal. We ate them with cream. And we ate them stewed with dumplings, better known as grunt.

My favorite picture from childhood is one with the whole gang of us, back from the field, with buckets and buckets of berries. I was about 8 years old and wearing a Donny and Marie Osmond hoodie (that might give away my age). My baby sister who was supposed to be saying “cheese” for the camera couldn’t stand the temptation. Just as the shutter clicked, she was caught, buried up to her elbows, with a big blue-stained-teeth grin.

DSC_0816

My blueberry grunt follows the traditional recipe with the exception of adding cinnamon and custard to the mix. You don’t need either, they are not a requirement. But I find the custard gives the sauce a velvety texture and helps cut a bit of the acidity in the berries. The cinnamon just adds a subtle spice flavour.

Some would rather stick to the bare-berry recipe. And there is certainly nothing wrong with that. As far as simple dessert recipes go, this is my favorite.

Adding the blueberries to the water and custard mixture.

Adding the blueberries to the water and custard mixture.

Sauce is bubbling and dumplings are cooking

Sauce is bubbling and dumpling dough is in!

Sauce Ingredients:

2 pints blueberries

1 cup water

1 cup sugar

1 tsp cinnamon

2 tbsp custard powder

Dumpling Ingredients:

2 ½  cups flour

4 tsp baking powder

1 tbsp sugar

½ tsp salt

2 tbsp cold butter

About ½ cup milk (or enough to achieve a soft dough)

Method:

Make dough for dumplings: sift flour, salt, sugar, and baking powder in a medium mixing bowl. Cut in butter until crumbly. Slowly add milk and mix in just until a soft dough forms. Don’t over work it. Set aside.

Make sauce: In a large pot, whisk custard with water over medium heat until powder dissolves. Add the sugar, cinnamon, and berries and continue to stir frequently until it just starts to bubble. With a spoon, drop in big clumps of dough all around the pot and in the center. Turn heat to low and cover the pot. Simmer for 15 minutes until dumplings look cooked.

Serve warm by placing a piece of dumpling on plate. Spoon on the sauce. Eat just like this or, as I would suggest, with a scoop of vanilla ice cream.

Or, you could serve on top of a dollop of warm custard and top with ice cream (my personal favorite).

A word of caution… My dad loved to tell about the time a relative (whom I will not name) came to visit. My mom made a huge pot of blueberry grunt. My mystery relative had a few helpings before they proceeded on their long trip home. Let’s just say they had to make several stops!

I would suggest that copious amounts of berries and long road trips don’t go well together. My dad always laughed when he told that story and ended it “…and that’s why they (really) call it blueberry grunt”.

I can still hear my dad’s snorty laugh. Good times.

: Banana Burritos

DSC_0557This lovely decadence was adapted from an Asmah Laili recipe. Asmah is well-known as a Singaporean radio personality turned gourmet. She has produced several beautiful cook books. I am happy to own a few.

Her recipes are a mix of traditional and fusion dishes, at times with a nod to Western tastes. Like this delightful dessert; ooey-gooey, mildly spiced, mashed banana inside a fried burrito. That sounds awesome but that’s not all. It’s served warm with sides of custard, ice cream, and a drizzle of caramel sauce. Tone down the sweetness and add texture with crunchy toasted almonds.

DSC_0563

The silky to-die-for caramel sauce is from Ree Drummond’s easy caramel sauce recipe. The custard was not from scratch. I used Bird’s instant custard powder. Any instant custard will do the trick.

…Oh baby, is it rich!

In fact, SO rich, this is a dessert better served in smaller portions. At least until you can recover enough for another round.

And a date with a treadmill to follow!

DSC_0559

Ingredients:

5 ripe bananas (3 mashed smooth, 2 coarsely mashed)

12 soft tortillas ( *soft taco size, not the large size for making quesadillas )

1/4 cup brown sugar

3 tbsp butter

2 tbsp lemon juice

1/2 tsp ground cinnamon

+ custard thickener for banana filling: 3 tbsp custard powder mixed with 6 tbsp water.

+ small amount of flour and water mixed to a paste for sealing tortilla ends.

+ vegetable oil for frying

+ Toasted almonds for garnish

+ Prepared custard and caramel sauce for drizzling

Method:

No need for mixing bowls, you can do all this in the skillet if you want.

DSC_0508 In skillet, over medium heat, melt butter.. Add brown sugar followed by 3 smoothly mashed bananas, cinnamon, and lemon juice. Cook until just bubbly. Lower heat and coarsely mash in the remaining 2 bananas followed by the custard thickener.

DSC_0520 Mix well and cook on low for about 5 minutes, stirring occasionally .Turn off and allow to cool.

DSC_0528

Prepare caramel sauce and custard. Toast almonds, if using.

DSC_0529Lay out each tortilla and dollop on the banana filling. Then, taking some flour-water paste with your finger, moistened all around the inside perimeter of the tortilla. and roll as you would a burrito. Seal the ends using extra paste if needed. Do this until all burritos are rolled. If you aren’t sure how to roll a burrito, here is a video showing how:

DSC_0546Heat a wok with about an inch deep of oil. Fry burritos, a couple at a time just until golden (about 3-4 minutes), flipping half way through. Remove to paper towels. Serve warm with a scoop of ice cream, drizzled custard and caramel, and a sprinkling of toasted almonds. Makes about 1 dozen burritos.

DSC_0551

: Favorite Blueberry Lemon Bars

DSC_1008Winter has dumped a whole lot of snow on us East Coasters recently. And as beautiful as it is, it is responsible for this shack happy state of mind I am developing.

DSC_0940

For 3 days straight, I was stuck inside with the 3 little ones. The first day was actually fun, sleeping in, and nowhere to go. No pressing appointments. No school lunches to make. No need in deed, to get out of our pajamas!

But the next 2 days were trying, to say the least. Boredom eventually sets in and with 3 children close in age, it’s not pretty.

Although…the outside is. But it is too cold and buried to enjoy it…

DSC_0936

So, to thumb my nose at old man winter, I am making something sweet and reminiscent of summer. These blueberry lemon bars are a favorite in my house. Usually, I make them in late summer when wild Nova Scotia blueberries are in season. Luckily, I found a bag of frozen ones in the grocery store.

Basically, they have a short bread type crust. Very flaky and buttery.And the topping is a blueberry filled custard with a slight lemony zing. They are really nice warm out of the oven with a scoop of vanilla ice cream.

Ingredients for blueberry filling:

2 cups of blueberries

Juice of half a lemon

1 tsp lemon zest

4 large eggs

1/4 cup cream

1 cup sugar

1/2 tsp baking powder

Ingredients for crust:

2 1/4 cups flour

1/2 cup confectioner’s sugar

1 cup butter, cut in small pieces

Method:

Preheat oven to 350 degrees and line a 9×13 baking dish with parchment paper.

In a mixing bowl, combine butter, confectioners sugar, and flour. Cut butter into the flour and sugar with a pastry cutter until a course crumbly mixture forms. It won’t resemble dough, but it should hold together when pressed with fingers. Pour into baking dish, level it, and press down firmly with a fork. Bake just until it starts to turn a light golden, about 20 minutes. Remove from oven and set aside.

In a mixing bowl, mix baking soda and sugar with a fork. Whisk in the eggs, lemon juice, cream, and lemon zest. Lastly, stir in the blueberries, mixing well. Pour this over the crust, leveling it with a spatula. * if you use frozen berries, thaw them first in a colander over some paper towel.

Bake for 25-30 minutes, until the blueberry topping is no longer jiggly and edges are turning brown.

Remove from the oven and let cool 15 minutes before cutting into squares.

Serve warm with ice cream or cold with whipped cream.

Makes about 16 squares.

DSC_0948

DSC_0997

: Nova Scotian gingerbread cake

DSC_0415

By mid-morning I was surprised to look out my patio doors and see it snowing. We were expecting slight flurries, but not actual accumulating snow.

DSC_0337

I knew my warmth-loving- shovel-hating husband would be at work when one of his co-workers broke the news to him. I can’t help but chuckle a little. How fortunate he fell in love with this Canadian gal before he spent a full winter here.

But all joking aside, virgin snow is wonderfully beautiful. It’s romantic. It’s magical. And all this is more true when you are inside, looking at it from a comfortably warm vantage point.

I recently bought this recipe book, “Out of Old Nova Scotia Kitchens”. I had been meaning to try the gingerbread recipe. Not the German gingerbread cookies, but the cake. Today seemed like a good day.

recipe book

Shakespeare once said, “ had I but a penny in the world, thou shouldst have it for gingerbread”

If Shakespeare swooned over it, it should suffice in lifting my guy’s spirits.

I remember the first time we ate gingerbread together. It was at the Sou’Wester restaurant at Peggy’s Cove, Nova Scotia.  If you are ever there, try a piece. It’s excellent! Especially if it’s a blustery day at the old lighthouse.

Interestingly, gingerbread is a very old recipe. It is thought to have been brought back to Europe in the 11th century, by the Crusaders, after they obtained it in the Mediterranean. Before that, it is not certain where it originated from. This particular one was perfected by our Nova Scotian Grandmothers.

start by creaming together sugar, butter & shortening

start by creaming together sugar, butter & shortening

molasses

batterx

pan lined with greased parchment paper

If there was any fault I found with this recipe, it is that I had to bake it 10 minutes longer than suggested. And because I took it out prematurely, the center fell. I got over that when I tasted it.

It is a balanced, moist, and dense cake. Though laden with molasses and white sugar, it does not taste terribly sweet as one might expect. As far as a sweetener goes, molasses is a good choice that you can feel less guilty about. It’s got vitamin B6, potassium, iron, and other vitamins and minerals.

This cake is best served warm with whipped cream or a scoop of vanilla ice cream.

Ingredients:

¼ cup butter

¼ cup vegetable shortening

½ cup sugar

1 egg, beaten

1 cup molasses

2 ½ cups sifted flour

1 ½ tsp baking soda

½ tsp salt

1 tsp ginger

1 tsp cinnamon

½ tsp cloves

1 cup hot water

Method:

Cream the butter, shortening, and sugar until fluffy.

Add the egg and molasses, mix well.

Sift together flour, baking soda, spices, salt, and add to creamed mixture. Lastly, add the hot water and beat until smooth.

Bake in a greased, 9×9 inch pan in 350 degree oven for 45 minutes, or until done.

: Pumpkin Cheesecake with Candied Pecans

my pumpkin cheese cake

With all these pumpkins I have been roasting since Halloween, it triggered a memory. I made this delicious cheesecake a couple years back. This is my adapted version of Paula Deen’s pumpkin cheese cake.

Undoubtedly this was the BEST cheesecake I’ve ever turned out. The flavours are rich and complimentary and the texture not too dense nor to fluffy. But one of the people I shared it with made it a very special memory.

We lost our Dad this year, who fought a short but courageous battle with Leukemia.

After beholding the finished creation, I recall calling my parents and telling them, “come on over! I made cheesecake!” I am glad we spent that day together. I am pleased that Dad enjoyed my cake. And that I was proud enough to take  this picture that I will always cherish.

dad eating pumpkin cheese cake

Just because I use light cream cheese as an ingredient, that doesn’t  make this anything less than a very sinful dessert. But you know what they say, a waist is a terrible thing to mind.  Or something like that.

* I adapted this Paula Deen recipe to be a smidgen ‘lighter’ and also to have a bit more spice. If you have a delicate palete to spice, you can follow her recipe instead.

Ingredients (crust):

2 cups graham cracker crumbs

3 tablespoons brown sugar

½ tsp cinnamon

½ cup melted butter

Ingredients (filling):

3 (8 oz) packages cream cheese, at room temperature

2 cups pureed pumpkin

3 eggs plus 1 egg yolk

1/4 cup sour cream

1 cup sugar

1/2  cup brown sugar

1 tsp cinnamon

1/4 tsp ginger

1/4  teaspoon nutmeg

1/8 teaspoon cloves

2 tbsp all-purpose flour

1 tsp vanilla extract

½ cup candied pecans for topping

Method:

Preheat oven to 350 °.

To prepare crust, combine crumbs, sugar and 1/2 teaspoon cinnamon in a bowl. Add melted butter. Toss with a fork to coat all the crumbs. Pour and press down into a 9-inch spring form pan. Set aside.

Meanwhile, beat cream cheese and sugars until smooth. Add pumpkin puree, eggs, egg yolk, sour cream, and the spices. Add flour and vanilla. Beat together until well combined.

Pour into crust. Spread out evenly and place oven for 1 hour. Remove from the oven and let sit for 15 minutes. Cover with plastic wrap and refrigerate for 4 hours. Before serving, place pan on cake stand after loosening sides with a knife or frosting spatula. Release spring form. Garnish as desired.

Emeril Lagasse’s  Burbon whipped cream for garnish: Mix together 2 cups sweetened whipped cream and a dash of bourbon. Just for subtle flavour. That’s it.

For chocolate cream garnish: combine  ¾  cup half-and-half and 1 tbsp butter in a medium pot, over medium heat. Melt and heat until a thin skin forms then add 8 oz chocolate chips and ¼ tsp vanilla. Keep stirring and when all chocolate melts turn off heat and allow to cool. Set aside in a container and gently warm it before drizzling on cheesecake just before serving. Top with a dollup of burbon whipped cream.

my pumpkin cheese cake slice